

Crisp ceiling trim gives any plain room an instant upgrade. Yet many homeowners hesitate to install crown molding on their own. Those compound angles look scary at first glance. However, you can master clean joints with the right steps. Let us build your confidence and trim out your room.
You do not need decades of trade school for this job. Basic patience and steady hands get the work done. In this guide, we break down every measurement and cut. Grab your safety glasses and let us get started.
Essential Carpentry Tools and Workspace Setup
Good trim carpentry demands dependable hand and power equipment. Dull blades or weak tools only cause frustration and tear wood. Taking time to gather solid gear sets you up for victory. Your cuts will stay clean and your joints will close tight. Clear your work zone before bringing any long trim boards inside. While clearing your work area, always inspect your drywall for moisture stains, as learning how to spot and seal a hidden water leak behind a wall ensures you never fasten fresh wood over damp, decaying studs. Clean surfaces guarantee that paint and sealants stick firmly later on.
The right gear makes every step move faster and safer. You need a clear measuring tape with precise fractional marks. A sensitive stud finder will help you spot wall framing behind drywall. Bring a sharp dual-bevel miter saw or manual saw to your work area. An accurate miter box angle guide works wonders for hand cuts. A light coping saw with fine wood blades cuts delicate curves. Use an eighteen-gauge finish nailer for clean, split-free pinning. Finally, keep a smooth caulking gun and quality paintable sealant ready for seams.
Set up your cut station in a wide open space. A garage, back patio, or empty living room works best. Lay down drop cloths to catch fine sawdust and wood chips. Vacuum the ceiling corners to remove old dust webs. Clean surfaces guarantee that paint and sealants stick firmly later.
Quality gear reduces mistakes and saves money on wasted trim. Take a few minutes to check your saw blade alignment. A ninety-degree calibration check prevents crooked cuts throughout the day. Now your setup is ready for accurate room measurements.
Checking Walls and Finding Framing Anchors
Drywall corners are rarely flat or perfectly square. Old houses settle and new framing lumber often twists slightly. Thick coats of drywall mud also build up in corners. Do not expect ninety-degree walls anywhere in your home. Professional carpenters anticipate these variations before cutting any stock.
Locate your interior wall studs using your stud finder. Mark each stud location on the wall with light pencil marks. You must also trace the overhead ceiling joists carefully. When you install crown molding, strong anchors keep joints tight. Weak fastening leads to sagging trim over changing seasons.
Run a chalk line along the top of your wall. This mark acts as your visual guide for the molding. It ensures your trim maintains a steady height across long expanses. Wavy walls will try to pull your trim out of line. Reference marks help you maintain a straight, professional sightline.
Framing anchors provide the solid backbone for your entire project. Without them, nails simply slip into hollow drywall sheets. Take your time during this layout stage to avoid loose trim. Solid framing connections make the rest of the installation effortless.
Understanding Miter Joints Versus Coping Techniques
Inside corners demand a clear choice in your joinery style. Standard miter joints cut two boards at opposing forty-five degrees. That method sounds fast and easy on paper. Sadly, slightly crooked corners cause mitered seams to pull apart. The front edge opens up and shows ugly gaps.
Back-coping inside corners solves this frustrating seasonal issue completely. One board sits flat against the adjoining corner wall. The second board is shaped to fit that profile. A coping saw removes the hidden back material smoothly. This tight joint stays closed even if framing moves later.
Beginners who fear intricate cuts have another practical choice. You can add a decorative corner block in every turn. This neat block gives you a flat surface to meet. Every main wall run then takes a simple ninety-degree cut. That makes corner work friendly for any first-time renovator.
Pick the corner method that fits your current confidence level. Coping delivers the most durable, professional look over time. Corner blocks offer a fast shortcut with classic charm. Either path beats struggling with poorly fit open miters. Practice on scrap lumber before cutting your finished boards.

Step by Step Guide to Cutting Corner Angles for Molding
Cutting molding correctly requires flipping your mental orientation completely. Crown molding sits on a slope against the wall and ceiling. To cut it on a saw, you must hold it upside down. The ceiling side rests flat on your saw table. The wall side rests flat against the vertical fence. Studying an illustrated crown molding installation guide before making your first cuts helps you visualize this inverted positioning clearly. That extra visual reference prevents costly measurement errors on expensive trim boards.
Follow this step by step guide to cutting corner angles for molding closely. Place the molding inverted against your saw table and fence. Hold the board tight so it does not rock or slide. Swivel the saw arm to forty-five degrees left or right. Let the saw reach full speed before starting your cut. Lower the blade smoothly to prevent tear-out on the face. Cut your piece slightly long for fine adjustments. Test the fit on your wall before nailing it down.
Learning how to install crown molding without professional tools requires care. You can use a hand saw and a manual miter box. Keep the molding seated firmly against the interior box ribs. Saw with steady strokes and let the teeth do the work. Rushing hand cuts leads to wandering lines and uneven joints.
Always cut your longest wall pieces first during the job. If you miscut a long board, you can trim it down. That ruined cut can still work on a shorter wall run. This simple trick saves expensive lumber from landing in the trash. Label each cut piece on the back to avoid confusion.
Nailing Strategies for Rigid Ceiling and Wall Joints
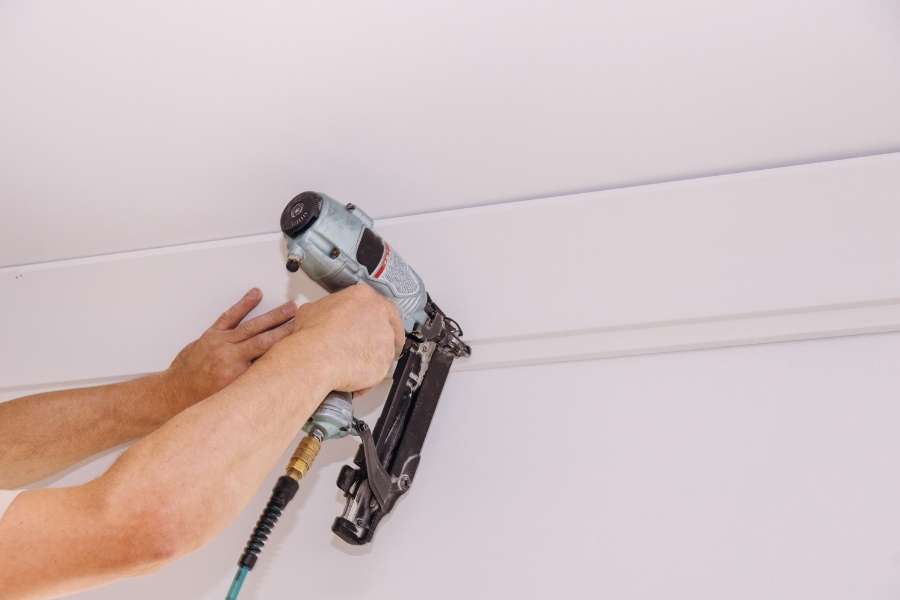
Once your boards fit cleanly, fastening them securely is next. Driving finish nails by hand with a hammer is risky. A single missed strike leaves deep dents on decorative wood faces. A modern pneumatic or battery finish nailer drives brads cleanly. It sinks nail heads beneath the wood surface without surface damage.
The best way to nail crown molding to ceiling joints requires strategy. Fasten the bottom edge into your marked wall studs. Angle the top nails upward into the overhead ceiling joists. This opposing nail angle locks the trim into the corner securely. Place nail pairs roughly every sixteen inches along the wall.
Be careful not to drive nails into hollow drywall spaces. Nails without solid backing will pop loose over time. If a section lacks framing, drive nails at crossing angles. This crossed pattern creates an internal mechanical clamp behind the wood. Always keep your fingers well clear of the nail path.
Check your joints as you move along the wall length. Push the molding tight against the ceiling before firing each brad. Keep your chalk line visible just below the lower edge. Consistent alignment ensures your finished trim looks straight from below. Take your time on ladders to stay balanced and safe.
Joining Long Runs with Clean Scarf Joints
Most living room walls stretch longer than standard trim boards. Trying to butt two square ends together looks messy. That seam will eventually crack and show through your paint. Master carpenters join consecutive boards using an angled scarf joint. This simple overlap creates a seam that vanishes under finish paint.
Cut both meeting boards at opposing forty-five-degree bevel angles. Place this overlapping joint directly over a solid wall stud. Spread a thin layer of wood glue between the matching faces. Pin both pieces into the stud with your nail gun. The angled seam distributes wood movement and stays flat.
Wipe away any excess glue with a damp rag immediately. Dried glue resists wood stain and makes painting difficult later. Sand the joint lightly once the adhesive sets fully. A properly executed scarf joint creates a continuous, unbroken trim run. Visitors will never spot where the two boards connect.
Long runs look best when lumber seams remain completely invisible. Scarf joints protect your hard work from ugly seasonal gaps. They take only seconds longer to cut on your saw. That tiny extra step elevates your trim work to craftsman standards. Quality joinery always pays off in the final look.
Professional Finishing, Caulking, and Surface Prep
Rough carpentry builds the shape, but finishing provides the beauty. Even master trim carpenters rely on filler and quality caulk. Houses have small wall humps and uneven plaster lines. Caulking seals those tiny gaps and blends trim into the wall. Painting turns separate wooden boards into a single architectural feature.
Load a tube of flexible acrylic latex caulk into your caulking gun. Cut the nozzle tip small at a clean forty-five-degree angle. Squeeze a steady, thin bead along the wall and ceiling joint. Smooth the wet caulk immediately with a damp finger or cloth. Wipe away excess material so no thick ridges remain visible.
Fill all sunken nail holes with non-shrinking carpenter wood filler. Pack the paste firmly into each hole using a putty knife. Leave the filler slightly raised above the surrounding wood face. Wood filler shrinks slightly as its moisture evaporates during drying. Sanding it flat later gives you a seamless surface.
Let your caulk and wood filler dry completely before painting. Rushing into paint traps moisture and ruins your smooth finish. Check the manufacturer labels for recommended dry times before proceeding. Good preparation makes your final paint coats look smooth and even. Clean surfaces guarantee that your hard work lasts for years.
Fine Sanding and High Quality Paint Application
Once your wood filler hardens, grab a fine sanding sponge. Sand each filled nail hole smooth using 220-grit paper. Run your bare fingers over every spot to check for bumps. Your hand detects tiny flaws that your eyes might miss. Wipe away all fine sanding dust with a soft tack cloth.
Spot-prime any bare wood cuts and sanded filler spots first. Primer seals raw grain so paint absorbs evenly across the board. If using raw wood, apply an oil or hybrid primer. Pre-primed MDF molding saves time and needs minimal spot priming. Let the primer dry according to the can instructions.
Brush on two coats of durable interior trim enamel paint. Semi-gloss or satin finishes are traditional choices for crown molding. These sheens reflect ambient light and clean up easily over time. Use an angled sash brush for clean, controlled paint strokes. Work in long, smooth passes to minimize visible brush marks.
Allow the first coat to dry before applying your second coat. A second thin coat builds rich color depth and uniform sheen. Your ceiling will look taller, brighter, and elegantly framed. Stepping down from the ladder reveals an incredible visual change. Quality paint locks in your careful carpentry work for decades.
DIY Trim Carpentry Tips for Living Rooms
Every room possesses unique proportions that dictate the best trim profile. High ceilings need wide molding to make a visual statement. Low ceilings look best with modest, delicate trim shapes. Installing oversized molding under an eight-foot ceiling makes spaces feel cramped. Choosing the correct proportions keeps your room balanced and inviting.
Planning ahead makes all the difference when tackling trim projects. Standard eight-foot ceilings pair best with profiles between three and four inches wide. Pre-primed MDF stock works wonderfully for these standard ceiling heights. Rooms with nine to ten-foot ceilings handle wider five-inch profiles with ease. Vaulted or two-story spaces demand wide seven-inch stock to hold visual weight. Reviewing these DIY trim carpentry tips for living rooms guarantees that your materials match your ceiling proportions.
Match your molding style to the existing doors and baseboards. Colonial casing pairs naturally with classic traditional crown designs. Modern homes look sharper with simple, clean-lined geometric trim profiles. Mixing conflicting trim styles creates visual clutter throughout your home. Cohesive woodwork gives your entire house a planned, architectural feel.
MDF remains the most economical and stable choice for living rooms. It does not warp, twist, or split like cheap lumber. It takes paint smoothly and cuts cleanly on your saw. Solid wood works best if you plan on staining the trim. For painted finishes, pre-primed fiberboard delivers fantastic results for less cash.
Invest time in planning your cuts, nailing solidly, and caulking neatly. That careful attention turns a simple weekend project into permanent value. You will smile every time you look up at your ceiling. True craftsmanship is simply care applied at every single step.
Frequently Asked Questions
What is the best material for crown molding if I am a beginner?
Pre-primed MDF is the best choice for beginners. It cuts easily, resists warping, and holds paint exceptionally well.
Can I install crown molding on walls with rounded drywall corners?
Yes, use rounded transition blocks at corners, or cut small three-piece mitered corners to wrap around the curve.
Why does my crown molding crack along the ceiling joint in the winter?
Framing lumber shrinks during cold, dry months. Always use flexible, elastomeric acrylic caulk to absorb seasonal house movement.
